Installation And Setup
The Video CutterV2 documentation is currently under development and subject to frequent updates. Changes are applied daily.
Video CutterV2, like its predecessor Video Cutter, automatically cuts contests for competitions. It offers significantly improved performance, utilizing up to 4 simultaneous threads for faster processing. Additionally, it supports FFmpeg cutting for offline recordings, enabling even greater speed.
Installation
Once installation is complete, an icon will appear on the desktop.

How to start the CutterV2
To start the CutterV2, please double-click on the CutterV2 icon on the desktop. You can also find the program by searching for 'CutterV2' in the Windows Start Menu (by pressing the Windows key on the keyboard).
After starting you have to accept the program through the firewall (first use of the program only).

Setup
To ensure the program works correctly, a few key settings need to be configured:
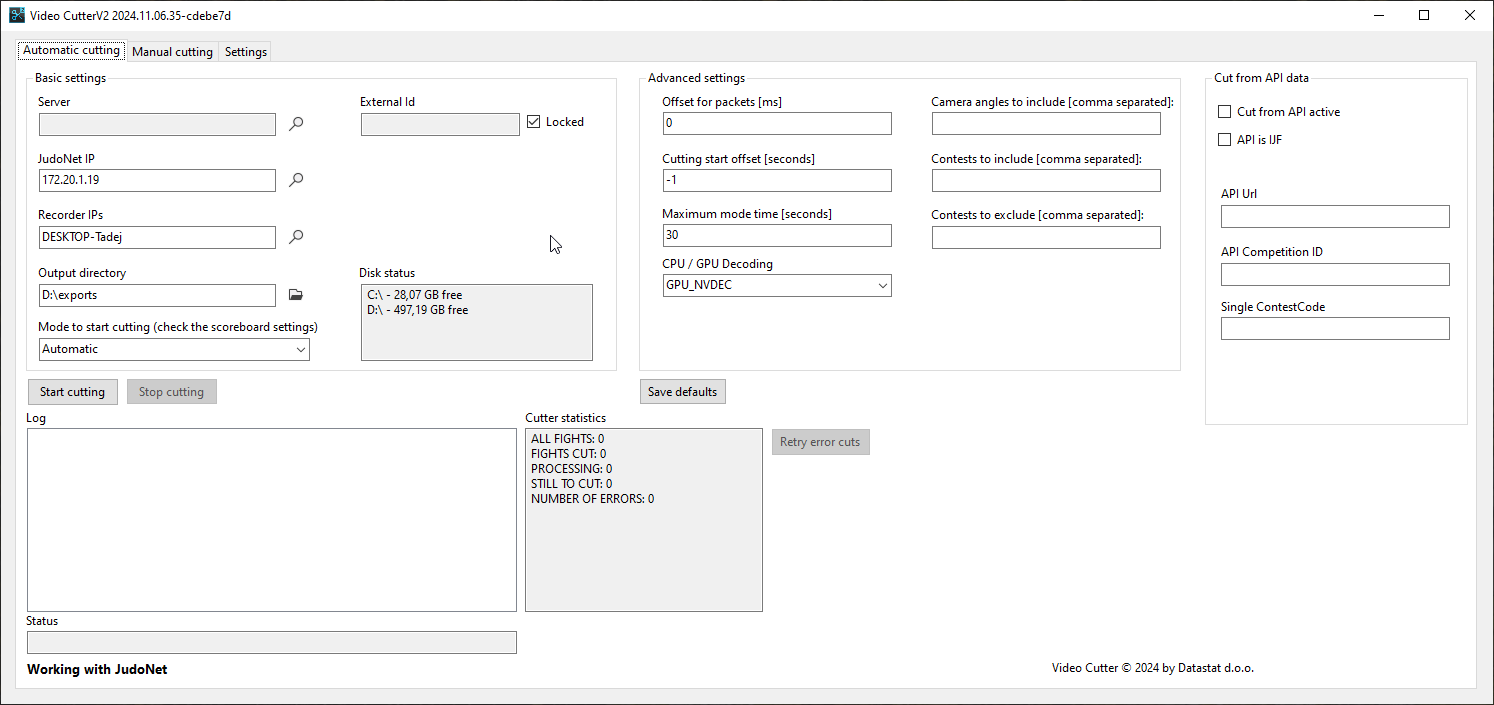
Select the Server
Click the magnifying glass icon next to the server field to open a window that lists all available servers on the local network. After selecting a server, the External Id field will auto-populate with the competition code of the currently selected competition on that server.Select the JudoNet Server
Similarly, click the magnifying glass icon next to the JudoNet field to open a list of available JudoNet instances on the network. Choose the relevant instance for your needs.Select the Recorders
Use the magnifying glass icon next to the Recorders field to open a list of available FR Recorder instances on the network. You can select one or more recorders that contain the competition recordings. Alternatively, you may enter an FR Recorder's hostname or, preferably, its IP address manually — however, using the magnifying glass is recommended to ensure accurate detection.⚠️ If a machine running FR Recorder has multiple IP addresses, make sure to select the one that corresponds to the active network interface.
After making your selection, click
Test cuttingto verify connectivity and cutting functionality. The program will connect to each selected FR Recorder and cut a short, 5-second segment from its most recent recording. These test clips are saved in the output directory.
Please remember to delete the test clips before starting the ingesting process (or cancel the corresponding ingester jobs).This quick test confirms that cutting works correctly and that all selected FR Recorders are reachable before the competition begins.
The Test cutting feature is available in version 2025.10.20.79 and later.
Specify the Output Directory
Select the output directory where the cut clips will be stored. Since the program tracks clips that have already been processed, it's recommended to define one dedicated output directory per competition.💡 Tip: You can double-click the output directory text box to open the folder in File Explorer (if it already exists).
If you are cutting clips after the event (post-festum), you only need a connection to a JudoNet instance, a FR Recorder connection, and the External Id field, which you can also fill manually if required.
Mode to start cutting field It is generally recommended to use Automatic mode unless you have specific requirements for manual control and you really know what you are doing.
Once all servers and settings are configured, click Start Cutting to begin processing clips.